
There are 3 ways to set up OneLedger Chronos Full Node:
-
GCP Marketplace Image
-
Docker Image
-
Build the Source Code
Video Tutorial
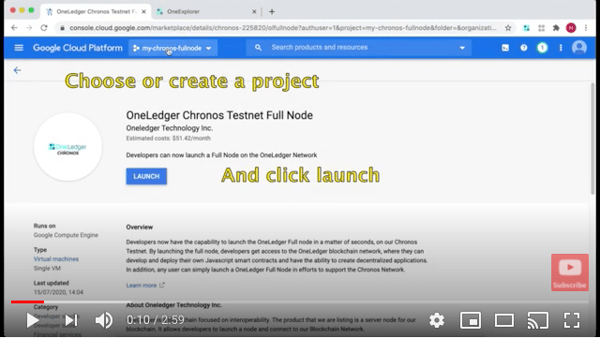
1. GCP Marketplace Image
-
Run a node on Google Cloud Marketplace now by clicking here
* Choose the name from your OneLedger instance
* Choose a machine type with at least 7.5GB of RAM; GCP charges you only based on the number of cores you choose, we recommend using 2 vCPUs
* You can keep all other fields set to the default values
* Click Deploy
2. Now you are up and running. Click on SSH to run your node.
cd /opt/.olfullnode
sudo mv genesis.json ./data
cd data
sudo olfullnode init --genesis genesis.json --node_name "your preferred name" --root ./
3. Start the service file and check the status
sudo service olfullnode start
sudo olfullnode status
2. Docker Image
-
Install docker on your machine.
sudo apt-get update
sudo apt-get install apt-transport-https ca-certificates curl software-properties-common
curl -fsSL https://download.docker.com/linux/ubuntu/gpg | sudo apt-key add –
sudo add-apt-repository "deb [arch=amd64]
https://download.docker.com/linux/ubuntu $(lsb_release -cs) stable"
sudo apt-get update
sudo apt-get install docker-ce
2. Now pull Chronos Fullnode docker image from dockerhub.
docker pull oneledgertech/chronos
3.Now run the docker image to start Chronos Fullnode.
docker run -it "image-id" /bin/bash
3. Build the Source Code
-
Install golang v0.13+ following instruction
-
Install libraries
sudo apt-get install libleveldb-dev libsnappy-dev -
Download the binary
wget https://github.com/Oneledger/protocol/releases/download/v0.14.3/olclient
wget https://github.com/Oneledger/protocol/releases/download/v0.14.3/olfullnode
chmod +x olclient
chmod +x olfullnodeAnd then put these binary to under any place of your executable $PATH (Example: /usr/local/bin)
-
Verify the binary’s md5:
For olfullnode:
md5sum olfullnode
should get
8506c62da4ca72bf61299747d0d7801a olfullnode
For olclient:
md5sum olclient
should get
43eccf7393a999ca067257d5d94aa94d olclient
-
Initialize the node
export OLDATA="any place that you want to run the node"
cd $OLDATA
wget
https://raw.githubusercontent.com/Oneledger/chronos-genesis/master/genesis.json
wget
https://raw.githubusercontent.com/Oneledger/chronos-genesis/master/config.toml
olfullnode init --genesis genesis.json --node_name "your preferred name" --root ./ -
P2P Configuration
Configure your "config.toml" file to make the network more stable and protect your nodes.
# Main address for P2P connections p2p_address = "tcp://<your-internal-ip>:26605" # Address to advertise for incoming peers to connect to external_p2p_address = "tcp://<your-external-ip>:26605"
get node id with olfullnode show_node_id --ip you will get id like 3c498d34846159daa9fcf265d8a3f4dcd46641d1@127.0.0.1:26605 configure the sentry and protected node like following sentry: # List of peers to maintain a persistent connection to persistent_peers = ["<protected-node-id>@<protected-node-ip>:26605"] # List of peer IDs to keep private (will not be gossiped to other peers) private_peer_ids = ["<protected-node-id>"] protected node: # List of peers to maintain a persistent connection to persistent_peers = ["<sentry-node-id>@<sentry-node-ip>:26605"] |
7. Run the node
olfullnode node --root ./
or
Run the node in background creating systemd service file:
|
vim olfullnode.service (Add below content) [Unit] Description=olfullnode Wants=network-online.target After=network-online.target [Service] Type=simple #User=alertmanager #Group=alertmanager ExecStart=/usr/local/bin/olfullnode node --root /home/user/OLDATA > /home/user/OLDATA/fullnode.log & #Restart=on-failure [Install] WantedBy=multi-user.target |
Enable the service file
systemctl enable olfullnode.service
start the service file and check the status
sudo service olfullnode start
sudo olfullnode status
8. Run the node in background creating systemd service file:
(Assuming "olfullnode" binary is located in $PATH /usr/local/bin. To append the fullnode log check the path where you run the fullnode.)
cd /etc/systemd/system |
Enable the service file
|
sudo systemctl enable olfullnode.service |
start the service file and check the status
sudo service olfullnode start |